|
|
2) Is it just me, or is the distance between the trim tab servo
output arm and the trim tab actuator going to come out so small that
you can't fit two of those clevises?
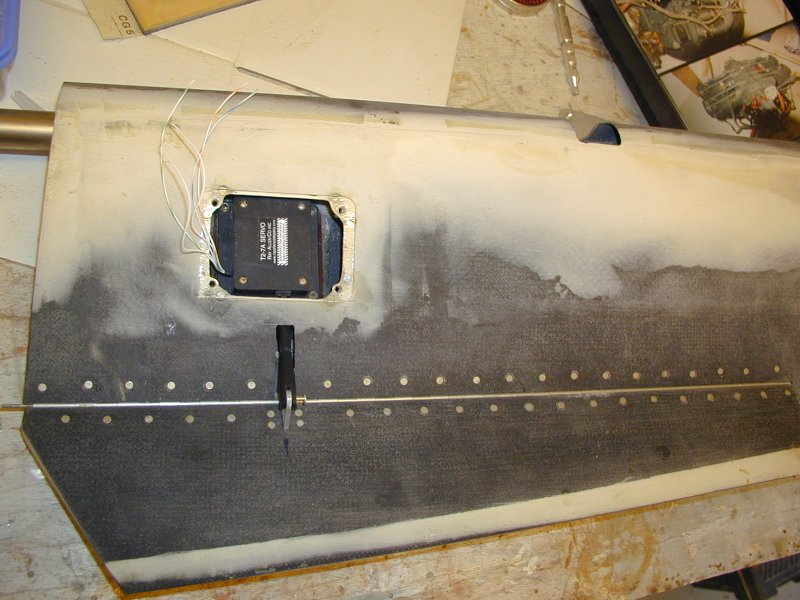
Here is a photo of my installation.
Don´t trust the manual. My bottom skin had a built-in recess that fit
the servo motor pretty accurate. I figured that this recess was made so
that the servo, when installed from the bottom, would make out the
cover for the access hole. No word about this in the manual, so I
called Josh at the factory to get things sorted out.
According to Josh, there were no specific rules about the issue, I
could basically suit myself.............. Sometimes this recess was
made in the bottom skin and sometimes in the upper skin............
Anyway, I asked if it would be ok to install the servo in the bottom
skin and still have the control horn on the bottom as well. This would
be ok, suit yourself............ I tried it, but the angle of the
pushrod came out at some 30 deg. or so, which induced severe bending
forces on the servo arm and, thus, a lot of slack in the trim system.
Not acceptable. I finally had to install the servo on the inside of the
upper skin and simply cut out the recess in the bottom skin (it was too
small to allow installation of the 1/8" phenolic and mounting screws)
and make a cover plate. This seems like an ok solution, but I had to
buy a T2-7A servo (0.75" stroke vs. 1.0" for the recommended servo) to
get the req´d 25 deg. (I think) servo deflection in both directions. I
did some experimenting with a longer control horn but, again, the angle
of the push rod became excessive.
As I recall it, I did not shorten the clevises. I just skipped the
safety nuts. The threaded piece has a very strong selv locking effect
when bottomed out in the clevises and the clevises cannot turn. No need
for safety wire or lock nuts here.
Very best regards
Tim Jorgensen
360MKIIFB / 60%

Elevator.jpg
|
|